Creating a New Project
Got the tools installed? This page takes you from a fresh clone to the kit running on a phone. If you haven't set your machine up yet, do that first — it's a one-time job.
Prerequisites. You need JDK 17, the Android SDK,
adb, and an AI agent (Claude Code). Install it all with Setup macOS, Setup Windows, or Setup Linux. Already set up? Run/kit-env-checkto confirm. You'll also need a device — a physical Android phone (USB debugging on) or an emulator. The kit targets Android 8.0 (API 26)+.
1. Project setup
After purchase you're added as a collaborator on the private kit repo. You start from a copy of it — that copy becomes your own app.
Clone the kit into a folder named for your app (you don't have your own repo yet — you
clone the kit and it becomes your app; /kit-save-to-github makes your private repo later):
git clone https://github.com/wajahatkarim3/shipkaro-android-kit my-app
cd my-app
my-app = whatever you want the folder called.
Open the folder in your AI agent (Claude Code: run claude in that directory) and move
on to the first run. The /kit-* commands ship inside the cloned repo, so they're
available the moment you open it — nothing to install separately.
Don't know git or GitHub? You don't need to. Build your app first; when you want a backup, run
/kit-save-to-githuband the agent creates your own private GitHub repo and pushes everything for you — no git commands to learn. (Optional — it's not required to ship to Google Play.)
2. First run — let the kit set itself up
Don't poke around the code yet. Run the master command:
/kit-start-setupIt walks you through, in order:
- Orientation + prereqs — confirms your SDK path, writes
local.properties - Rename — your package name, applicationId, and app display name
- Onboarding content — one sentence about your app → 3 intro screens
- Brand & theme — your color + icon pack
- Authentication — Supabase / Firebase / none
- Paywall — RevenueCat (skipped automatically for free apps)
- Analytics — PostHog / Firebase / Crashlytics / Sentry
- Build & run — compiles, installs, launches on your device
You answer questions; the kit makes every edit. At the end you have your app — renamed, branded, configured — running on your phone.
Full walkthrough of every step: The Flow — 0 to Google Play.
local.properties — your secrets file
Step 0 creates local.properties from the template. This file holds your SDK path and all
your API keys (Supabase, RevenueCat, PostHog, …). It is git-ignored — never commit it.
The setup commands write keys into it for you.
That's the whole setup. The rest of this page is background — how your new app behaves, where things live when you open the code, and how config and updates work. Read it now or come back later; nothing here is another step to do.
How your app flows
Out of the box your app runs a real, end-to-end flow (not a demo):
Splash (OS) → Onboarding (first launch) → Auth (if enabled, signed out)
            → Paywall (if enabled, not subscribed) → Home → Settings / Profile
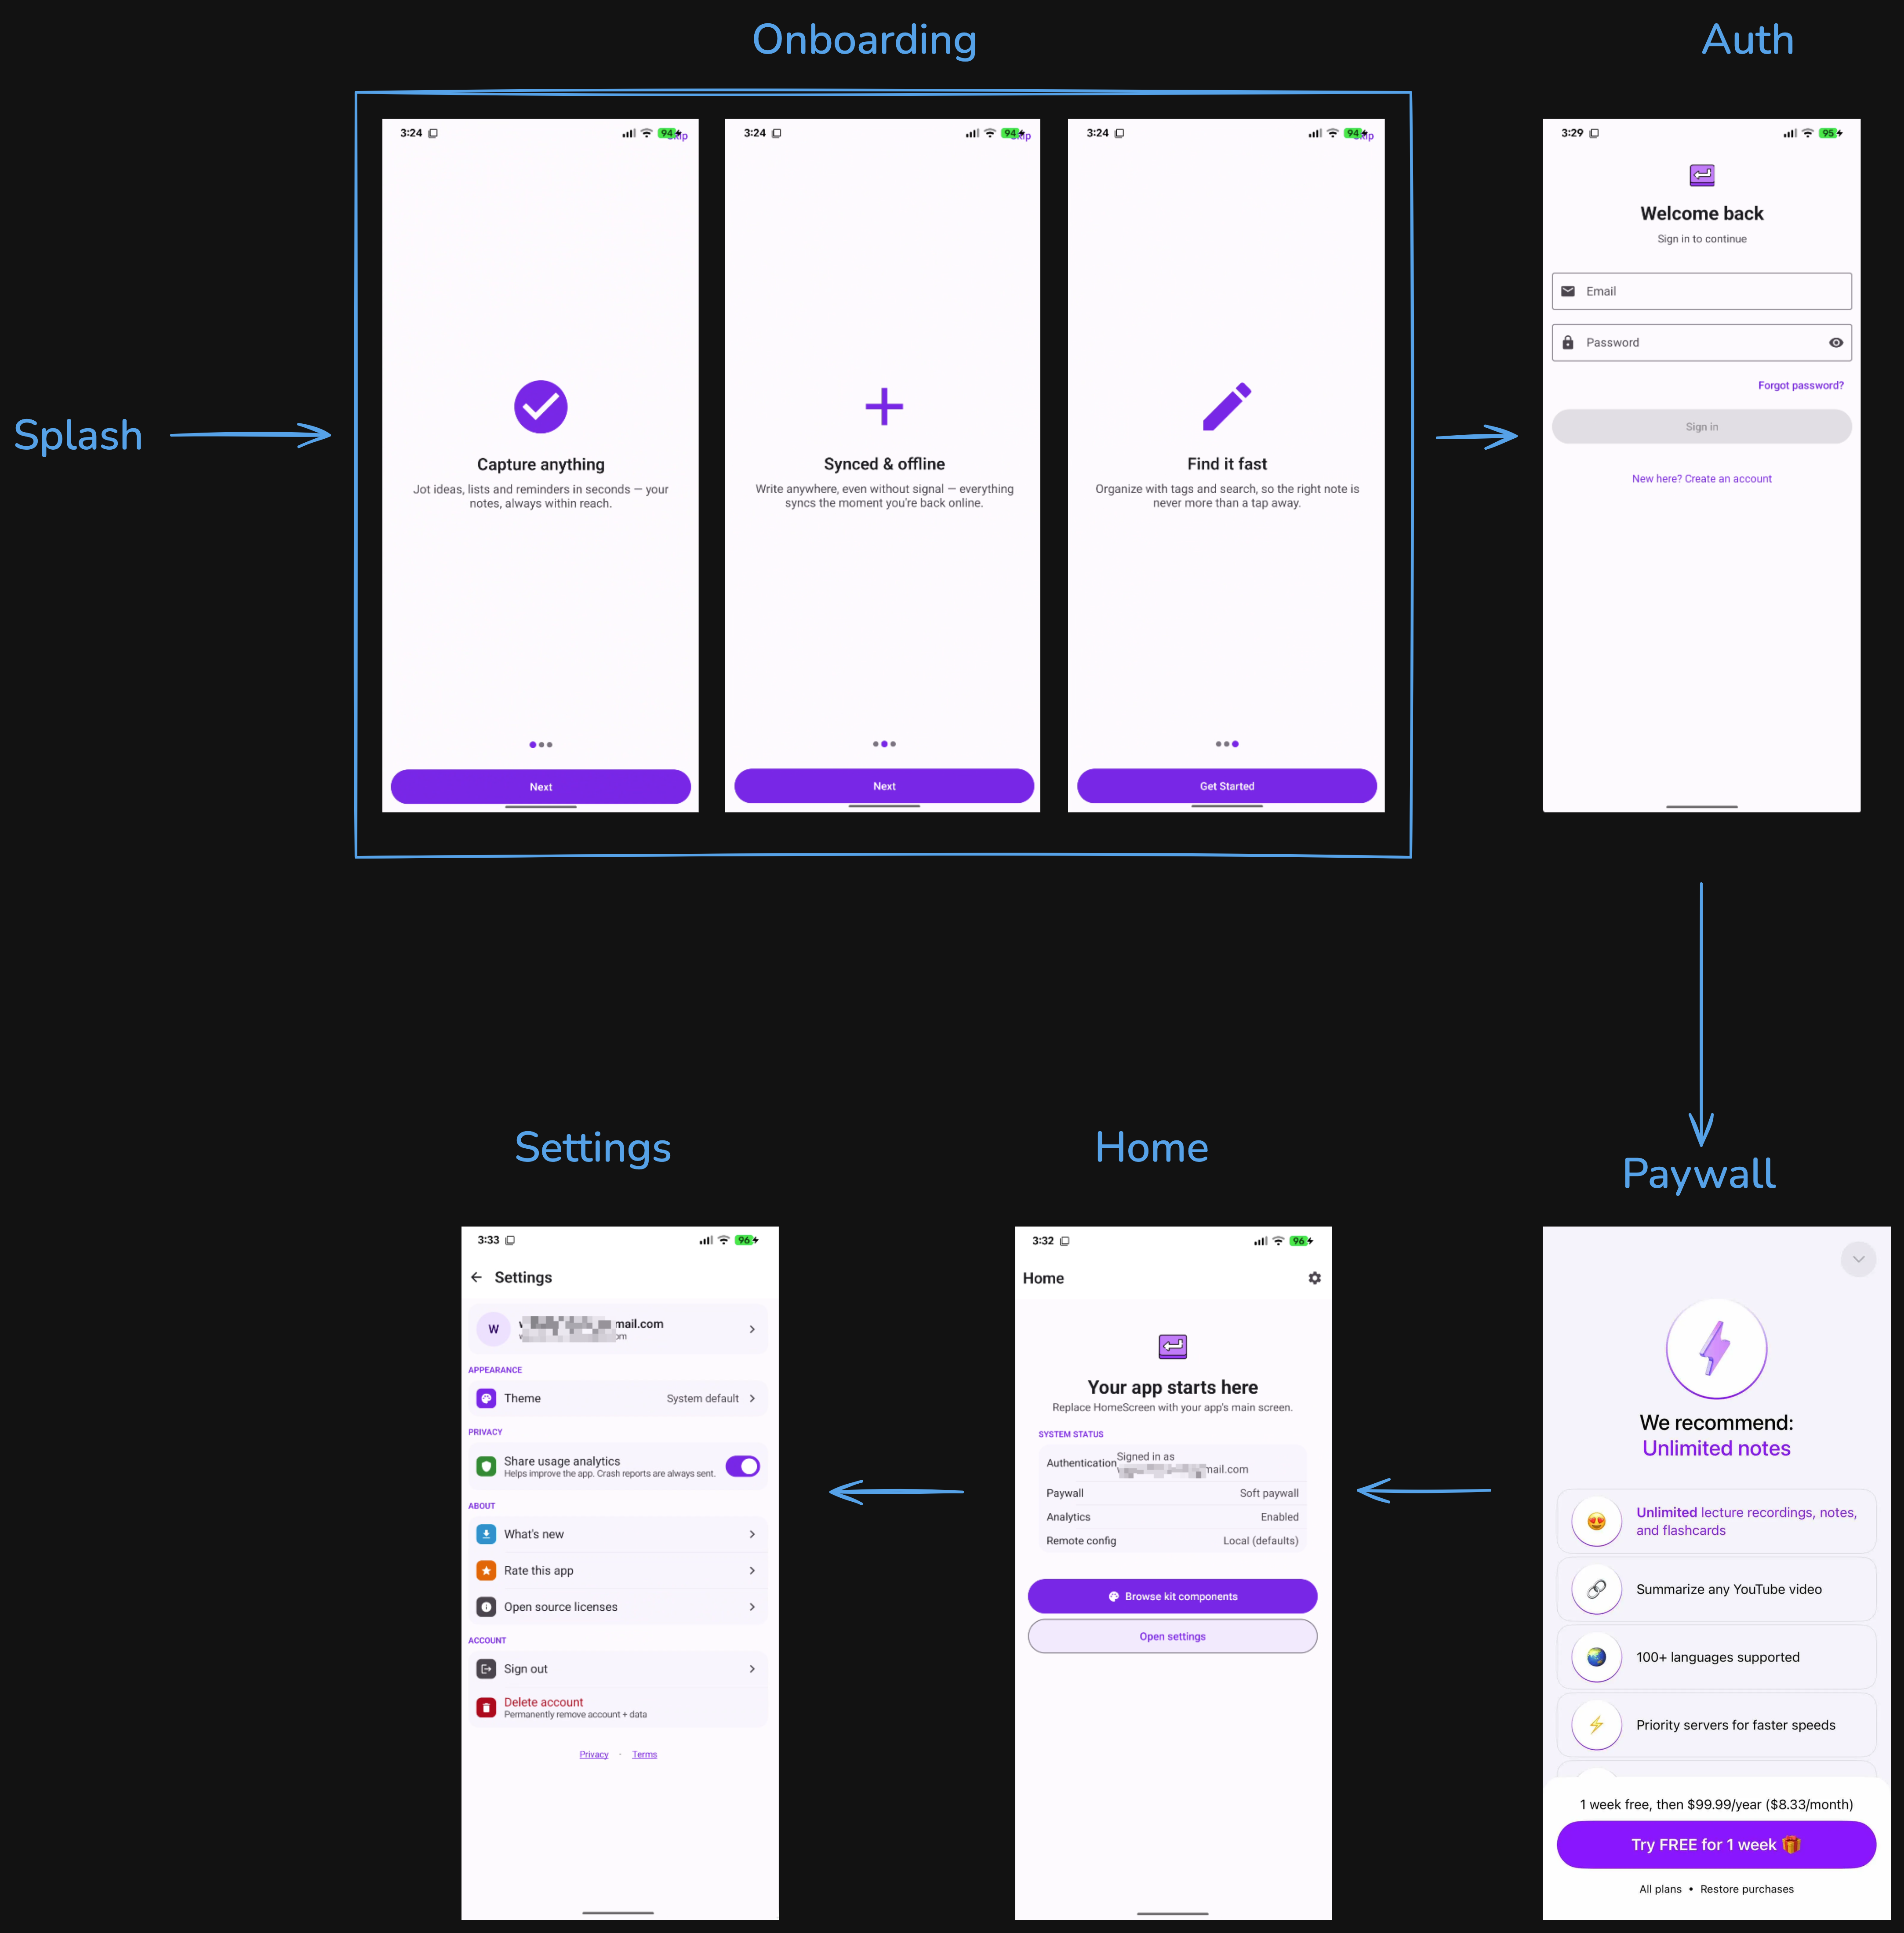
Each gate is skipped automatically based on the choices you made in setup. A free,
no-login app goes straight to Home. As you build, you replace HomeScreen with your app's
main screen.
Two kinds of config
The kit keeps two kinds of "config" strictly separate — worth knowing the difference:
KitConfig— compile-time switches you set once (which auth provider, paywall hard/soft, which analytics). The setup commands edit this for you. Lives incore/config/.RemoteAppConfig— runtime values you change later without shipping an update (force-update version, maintenance mode, changelog). Backed by Supabase, Firebase, or local. Lives incore/ops/.
You rarely touch either by hand. The commands do it.
The app's structure
You don't need this to start — the agent knows its way around. But when you do open the code,
here's the map. NowKit is a single app module, package-by-feature: no multi-module maze,
no buildSrc indirection — one place for everything.
app/src/main/java/dev/shipkaro/kit/
├── core/                  ← shared building blocks (you rarely edit these)
│   ├── ai/                ← OpenRouter client (AI features)
│   ├── analytics/         ← PostHog + Firebase + Crashlytics + Sentry
│   ├── auth/              ← AuthRepository + Supabase/Firebase/Stub impls
│   ├── billing/           ← PurchaseManager (RevenueCat)
│   ├── config/            ← KitConfig (your compile-time switches)
│   ├── data/              ← Room database + DataStore settings
│   ├── designsystem/      ← the 40+ components, theme, icons, foundation tokens
│   ├── log/               ← Timber + Crashlytics/Sentry trees
│   ├── navigation/        ← type-safe Route graph + KitNavHost
│   ├── ops/               ← UpdateManager, ChangelogManager, RemoteAppConfig
│   ├── security/          ← SecureDataStore (AES-GCM + Android Keystore)
│   └── util/              ← CustomTabs, PlayStoreLauncher, EmailLauncher, …
└── feature/               ← screens (you build your app here)
    ├── auth/              ← sign-in screen
    ├── catalog/           ← live component catalog (delete when done exploring)
    ├── home/              ← Home + system-status panel
    ├── onboarding/        ← intro pager
    ├── paywall/           ← RevenueCat paywall wrapper
    ├── permissions/       ← 8 full-screen permission flows
    ├── profile/           ← read-only profile + sign-out
    └── settings/          ← settings + theme/account/legal rows
Rule of thumb: build your app under feature/ and leave the shared building blocks in
core/ mostly alone. It keeps your code easy to find.
Kit updates
Think of the kit as a starting point you copy, not something your app stays plugged into. Once you clone the kit and start building your app inside it, that copy becomes your app — you won't pull future kit changes into it. That's on purpose: it keeps things simple and means a kit update can never break the app you're shipping.
You bought lifetime updates — bug fixes, new components, and new commands keep landing in the kit. The way to get them is simple: start your next app from a fresh copy of the latest kit. Each new app gets the newest version; the app you already shipped keeps running exactly as-is.
Watch the changelog to see what's new in each version.
Troubleshooting first run
| Problem | Fix |
|---|---|
java -version shows wrong version | Run /kit-env-check → installs JDK 17 |
Build fails: SDK location not found | Wrong sdk.dir in local.properties. Re-run /kit-start-setup Step 0 — it verifies the path. On Windows, use escaped backslashes: sdk.dir=C:\\Users\\<name>\\AppData\\Local\\Android\\Sdk. |
adb devices shows nothing | Enable USB debugging on the phone, or start an emulator |
| Gradle errors on first build | First build downloads dependencies — let it finish. If it still fails, /kit-env-check. |
| First build seems frozen / takes 20+ min | Normal: it's a one-time ~1 GB download and Gradle prints little while it runs. On Windows, add the Defender exclusions — they typically halve it. |
| Agent reports the build "timed out", then it hangs | The build ran in the foreground and got cut off (most agents cap a command at ~2 min; OpenCode's cap is hard). The killed run leaves lock files that hang the retry. Run /kit-update for the current commands — they build in the background — then clear the locks: kill any java process and delete *.lock under ~/.gradle (%USERPROFILE%\.gradle on Windows). |
Next: The Flow — 0 to Google Play — the full journey from here to a live listing.