Setup Linux
A one-time setup of your Linux machine so the kit can build, run, and ship Android apps. You do this once per computer. Follow the steps in order — each ends with a quick check so you know it worked before moving on.
On a Mac? Use Setup macOS. On Windows? Use Setup Windows.
The fast path: install the tools below, then — after you've cloned the kit — run
/kit-env-checkinside it. That command verifies everything in one shot and prints the exact fix for anything missing.
Commands below use
apt(Debian / Ubuntu / Mint / Pop!_OS) and~/.bashrc. On Fedora usesudo dnf, on Archsudo pacman -S; if your shell is zsh, edit~/.zshrcinstead. Restart your terminal (orsourcethe file) after any environment-variable change.
What you're installing:
- Build tools —
aptpackages the build needs (curl, unzip, etc.) - JDK 17 or newer — the Java the build runs on (17 and 21 both work)
- Android Studio — only to download the Android SDK (you won't code in it, and you don't need it for emulators — the
androidCLI creates and starts those) ANDROID_HOME— tells the tools where the SDK lives- Node.js — runs the CLI agents (Claude Code, OpenCode, Codex); install it if you use one
- An AI agent — Claude Code, Cursor, Antigravity, OpenCode, or Codex (runs the
/kit-*commands) - android CLI + Android Skills — Android know-how for the agent
- GitHub CLI (
gh) — backs your app up to GitHub (used by/kit-save-to-github) - scrcpy (optional) — screen mirroring
💡 You do not write code in Android Studio. The kit is built entirely from the terminal via your AI agent. Android Studio is here only to download the Android SDK.
1. Build tools
Update the package list and install the basics:
sudo apt update
sudo apt install -y curl unzip zip git
Verify: curl --version.
2. JDK 17 (or newer)
sudo apt install -y openjdk-17-jdk
Then point JAVA_HOME at it in your shell (~/.bashrc):
echo 'export JAVA_HOME="/usr/lib/jvm/java-17-openjdk-amd64"' >> ~/.bashrc
echo 'export PATH="$JAVA_HOME/bin:$PATH"' >> ~/.bashrc
source ~/.bashrc
Verify: java -version → should show 17.x. (If the path above doesn't exist, find it with
sudo update-alternatives --config java and use the directory it reports.)
3. Android Studio
Download from developer.android.com/studio, extract the
.tar.gz, and launch it:
tar -xzf android-studio-*.tar.gz -C ~/
~/android-studio/bin/studio.sh
On first launch, open SDK Manager (the ⋮ menu next to Clone Repository → SDK Manager) and enable:
- Android 15 (API 35) — the platform
- Android SDK Command-line Tools (latest) — under the SDK Tools tab
Click Apply to download.
(No-GUI / server?) You can skip Android Studio and install the SDK with the command-line tools: download Command-line tools from the same page, unzip into
$HOME/Android/Sdk/cmdline-tools/latest, thensdkmanager "platform-tools" "platforms;android-35" "build-tools;35.0.0".
4. ANDROID_HOME
Add to ~/.bashrc:
echo 'export ANDROID_HOME="$HOME/Android/Sdk"' >> ~/.bashrc
echo 'export PATH="$ANDROID_HOME/platform-tools:$ANDROID_HOME/cmdline-tools/latest/bin:$ANDROID_HOME/emulator:$PATH"' >> ~/.bashrc
source ~/.bashrc
Verify: adb --version.
Emulator (optional): hardware acceleration needs KVM —
sudo apt install -y qemu-kvm && sudo adduser $USER kvm, then log out and back in. Or just use a real device over USB (adb devices).
5. Node.js
The apt nodejs package is often too old. Install v18+ — the simplest is nvm:
curl -o- https://raw.githubusercontent.com/nvm-sh/nvm/v0.40.1/install.sh | bash
source ~/.bashrc
nvm install --lts
Verify: node --version (v18+).
6. An AI agent
Pick any one (all five run the /kit-* commands):
- Claude Code —
npm install -g @anthropic-ai/claude-code, thenclaudeto log in - OpenCode —
npm install -g opencode-ai, thenopencode - Codex —
npm install -g @openai/codex, thencodex - Cursor — download the app from cursor.com
- Google Antigravity — download from antigravity.google
The CLI agents (Claude Code, OpenCode, Codex) need Node.js from the previous step; Cursor and Antigravity are standalone apps. See Requirements for what each is.
Verify (CLI agents): claude --version or opencode --version.
7. android CLI + Android Skills
Download the android CLI from
developer.android.com/tools/agents, make it
executable and put it on your PATH (e.g. ~/.local/bin), then:
android update
android skills add --all
Verify: android --version and android skills list.
8. GitHub CLI (gh)
gh is how the kit backs your app up to your own private GitHub repo — /kit-save-to-github
uses it to create the repo and push, with no git commands for you to learn. The install depends
on your distribution — use your package manager:
sudo apt install -y gh          # Debian / Ubuntu / Mint / Pop!_OS
sudo dnf install -y gh          # Fedora / RHEL
sudo zypper install -y gh       # openSUSE / SUSE
sudo pacman -S github-cli       # Arch
gh auth login
If your package manager can't find it, GitHub's repo isn't wired up yet — the exact command for
every distro, plus .deb / .rpm / .tar.gz downloads, is on GitHub's official page,
cli.github.com (the Install dropdown). At the login prompts pick
GitHub.com → HTTPS → Login with a web browser. Verify: gh auth status.
Prefer a GUI? (optional) Official GitHub Desktop is macOS/Windows only — on Linux use
gh, or the community build at github.com/shiftkey/desktop. The kit only needsgh, which/kit-save-to-githubautomates for you.
scrcpy (optional)
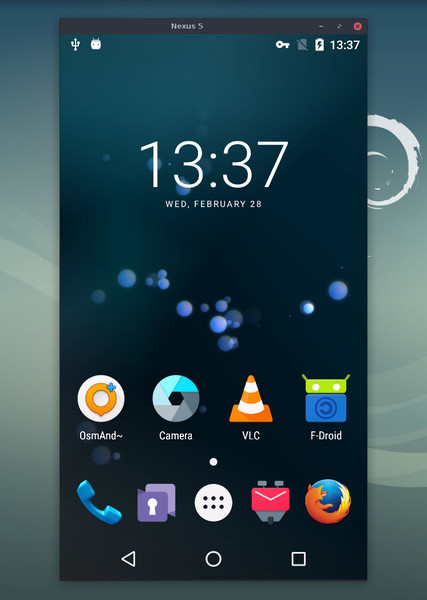
scrcpy mirrors your Android phone on your desktop — you see the screen in a window and control it with your mouse and keyboard. Great for testing and recording without picking up the device.
sudo apt install -y scrcpy
Verify everything — /kit-env-check
Once the tools are installed and you've created your project, open it in your AI agent and run:
/kit-env-checkIt checks JDK 17+, ANDROID_HOME, adb, the android CLI, the Android Skills, and the optional
tools — and prints the exact install command for anything still missing. Green across the board
means you're ready.
Troubleshooting
| Problem | Fix |
|---|---|
java -version shows the wrong version | sudo update-alternatives --config java → pick 17, and re-check JAVA_HOME |
adb: command not found | ANDROID_HOME / Path not set, or terminal not restarted |
android: command not found | The android CLI isn't on your Path — re-add it (e.g. ~/.local/bin) |
Build: SDK location not found | Wrong sdk.dir in local.properties |
Emulator won't start / /dev/kvm error | Install qemu-kvm + add yourself to the kvm group, or use a real device |
| Nothing works after editing env vars | Restart the terminal (or source ~/.bashrc) |
Still stuck? Run /kit-env-check — it diagnoses and prints the fix.
Next: Creating a New Project — clone the kit and run it for the first time.