Setup Windows
A one-time setup of your Windows PC so the kit can build, run, and ship Android apps. You do this once per computer. Follow the steps in order — each ends with a quick check so you know it worked before moving on.
On a Mac? Use Setup macOS. On Linux? Use Setup Linux.
The fast path: install the tools below, then — after you've cloned the kit — run
/kit-env-checkinside it. That command verifies everything in one shot and prints the exact fix for anything missing.
Run PowerShell as a regular user (not Administrator) for Scoop. Restart your terminal after any environment-variable change.
What you're installing:
- Scoop — package manager
- Git — Scoop needs it to install the other tools
- JDK 17 or newer — the Java the build runs on (17 and 21 both work)
- Android Studio — only to download the Android SDK (you won't code in it, and you don't need it for emulators — the
androidCLI creates and starts those) ANDROID_HOME— tells the tools where the SDK lives- Node.js — runs the CLI agents (Claude Code, OpenCode, Codex); install it if you use one
- An AI agent — Claude Code, Cursor, Antigravity, OpenCode, or Codex (runs the
/kit-*commands) - android CLI + Android Skills — Android know-how for the agent
- GitHub CLI (
gh) — backs your app up to GitHub (used by/kit-save-to-github) - scrcpy (optional) — screen mirroring
💡 You do not write code in Android Studio. The kit is built entirely from the terminal via your AI agent. Android Studio is here only to download the Android SDK.
1. Scoop — package manager
Scoop is a Windows package manager (the equivalent of Homebrew on a Mac) — it installs the other tools below with one command each.
Open PowerShell as a regular user — press Win, type powershell, and click Windows
PowerShell. Do not run it as Administrator: Scoop installs without admin rights and will
complain if you do.
Run these two lines, one at a time:
1. Allow your user account to run locally-created and signed remote scripts:
Set-ExecutionPolicy -ExecutionPolicy RemoteSigned -Scope CurrentUser
If it asks you to confirm, type Y and press Enter.
2. Download and run the Scoop installer (it installs into ~\scoop):
Invoke-RestMethod -Uri https://get.scoop.sh | Invoke-Expression
Verify: run scoop --version. A version number means you're set. If it says the command isn't
recognized, close and reopen PowerShell so it picks up the updated PATH, then try again.
You'll see the older shorthand
iwr -useb get.scoop.sh | iexfloating around online —Invoke-RestMethodabove is the modern equivalent and does the same thing.
2. Git
Scoop needs Git to add the extra "buckets" the next tools live in — without it,
scoop bucket add java fails with ERROR Git is required for buckets. Git ships in
Scoop's default main bucket, so this one line installs cleanly on its own:
scoop install git
Verify: git --version.
This is not the same as the GitHub CLI (
gh) in step 9 —ghtalks to GitHub.com;gitis the version-control tool Scoop itself depends on. You needgithere regardless of whether you ever usegh.
3. JDK 17 (or newer)
scoop bucket add java
scoop install openjdk17
Scoop sets JAVA_HOME automatically. Verify: java -version → 17.x.
4. Android Studio
Download from developer.android.com/studio and install. On first launch, open SDK Manager (the ⋮ menu next to Clone Repository → SDK Manager):
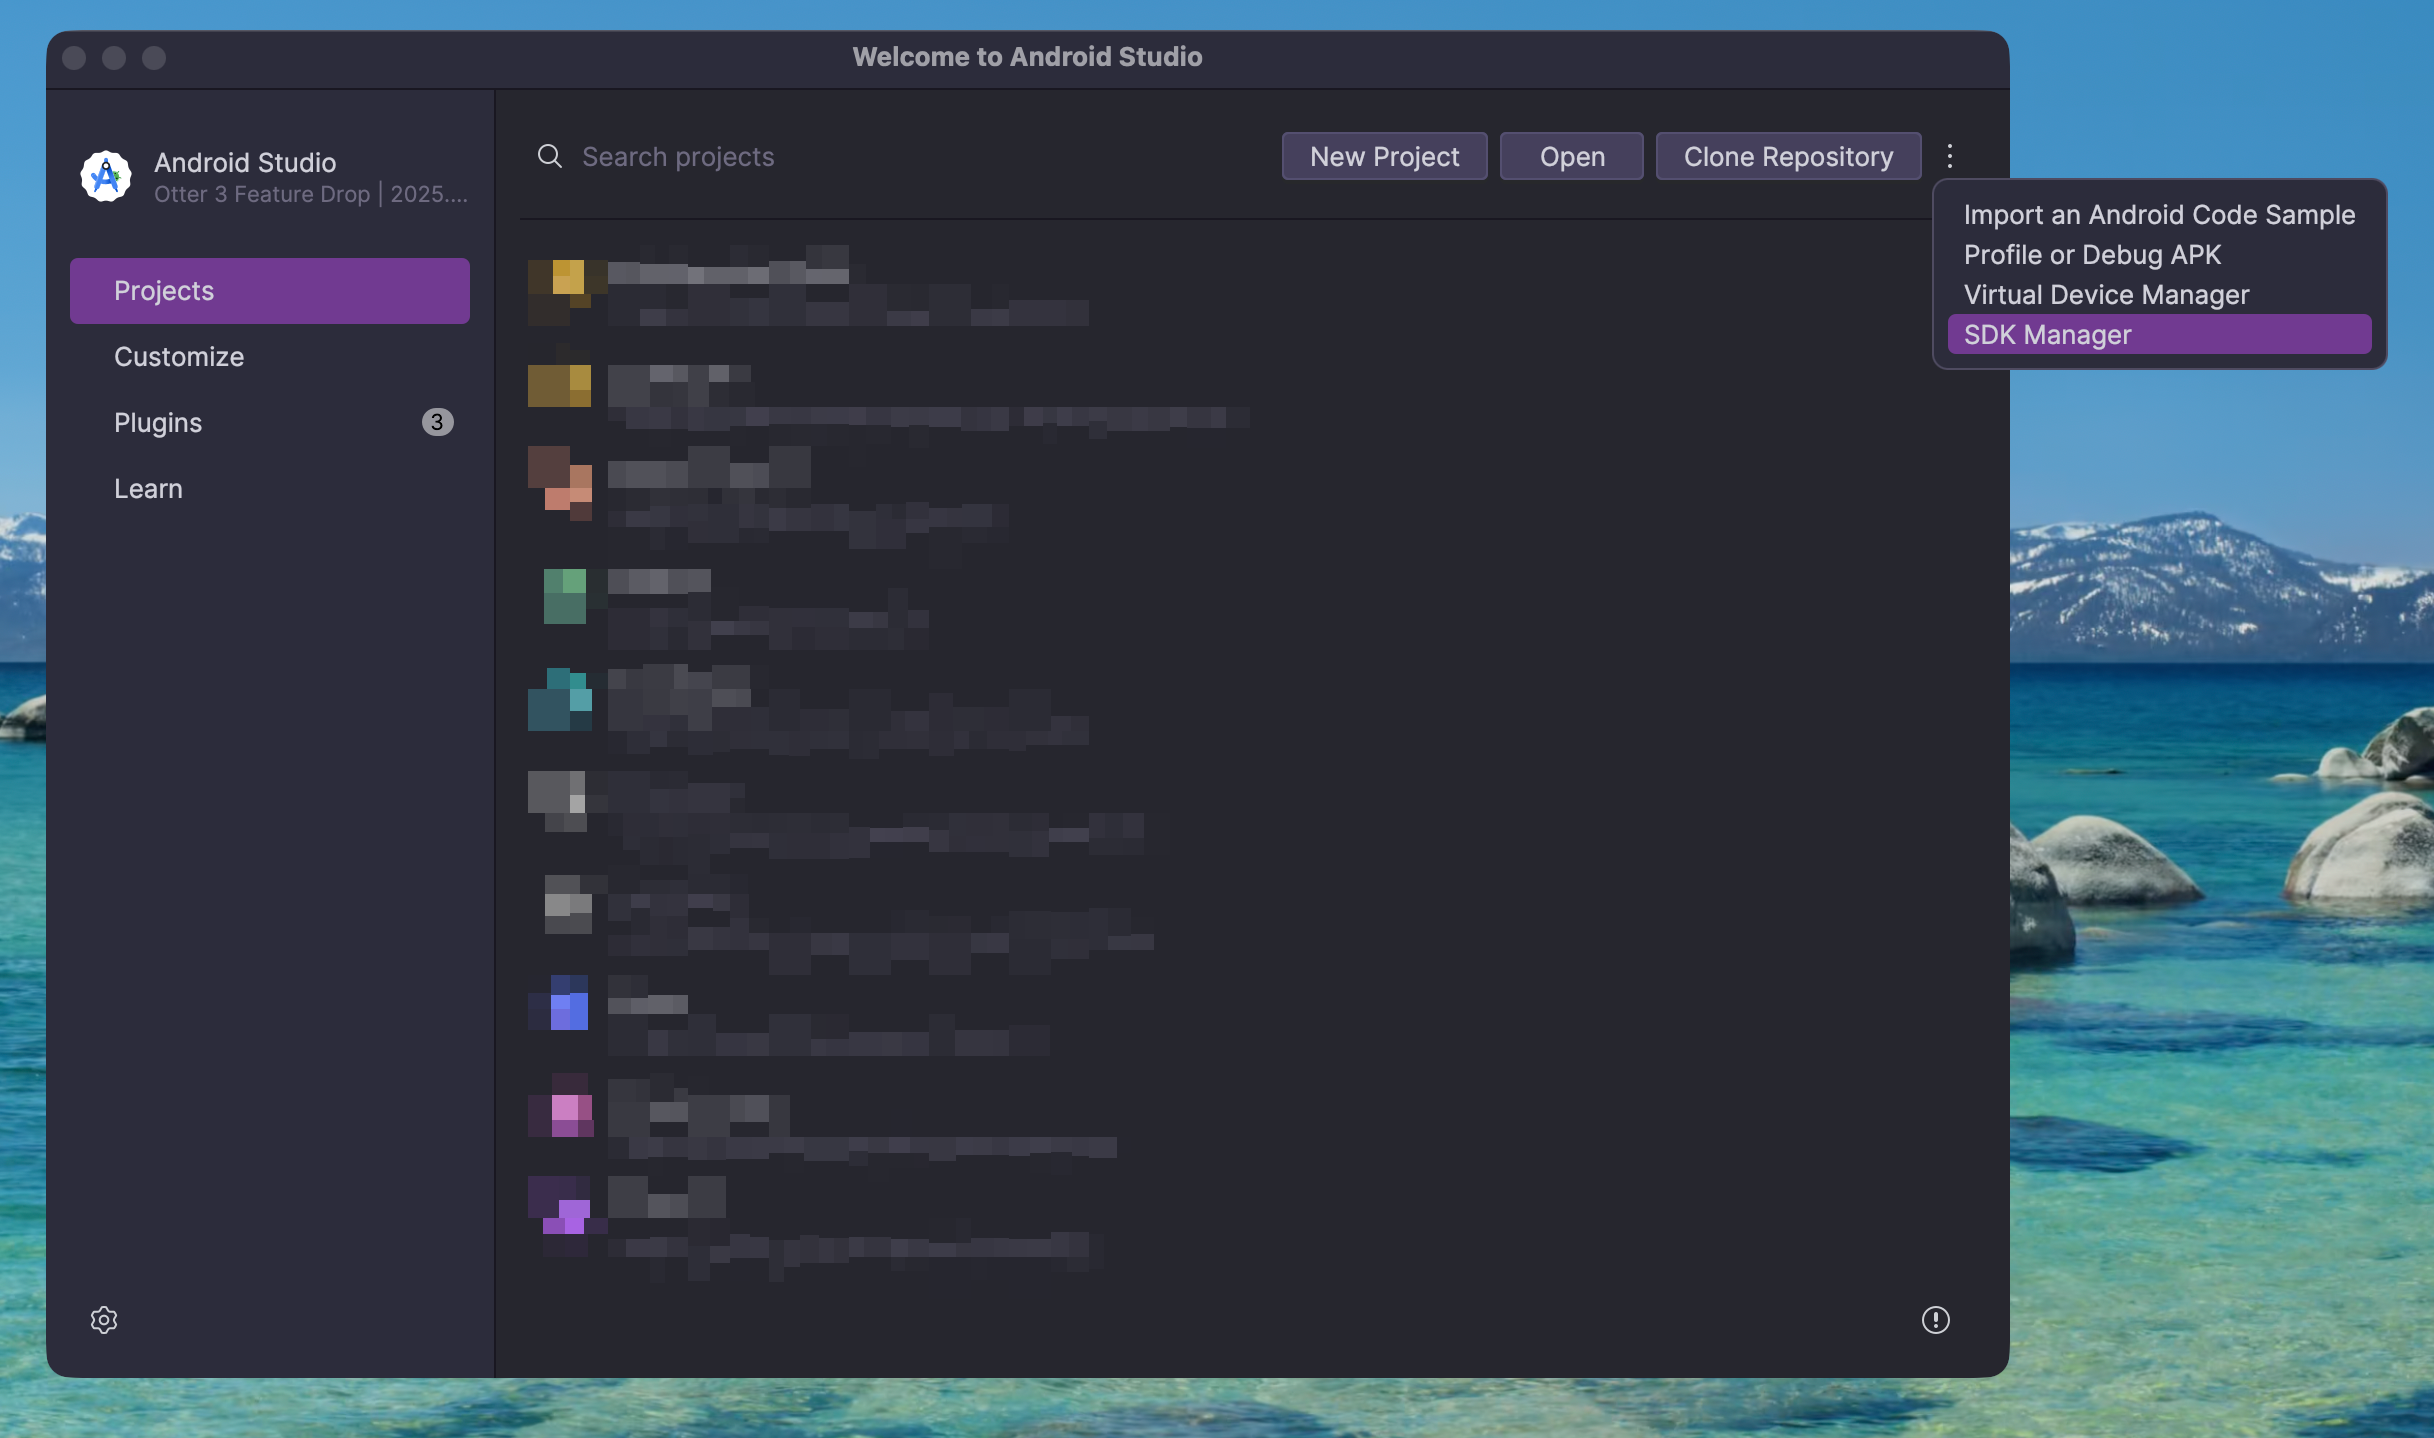
In the SDK Manager, enable Android 15 (API 35) and Android SDK Command-line Tools (latest) (under the SDK Tools tab), then click Apply.
5. ANDROID_HOME
Open System Properties → Environment Variables and add a new user variable:
| Variable | Value |
|---|---|
ANDROID_HOME | %LOCALAPPDATA%\Android\Sdk |
Then add these to your Path:
%ANDROID_HOME%\platform-tools
%ANDROID_HOME%\cmdline-tools\latest\bin
%ANDROID_HOME%\emulator
Restart your terminal. Verify: adb --version.
6. Node.js
scoop install nodejs
Verify: node --version.
7. An AI agent
Pick any one (all five run the /kit-* commands):
- Claude Code —
npm install -g @anthropic-ai/claude-code, thenclaudeto log in - OpenCode —
npm install -g opencode-ai, thenopencode - Codex —
npm install -g @openai/codex, thencodex - Cursor — download the app from cursor.com
- Google Antigravity — download from antigravity.google
The CLI agents (Claude Code, OpenCode, Codex) need Node.js from the previous step; Cursor and Antigravity are standalone apps. See Requirements for what each is.
Verify (CLI agents): claude --version or opencode --version.
8. android CLI + Android Skills
Downloading the android CLI directly from PowerShell isn't supported — get it via browser from developer.android.com/tools/agents and add the downloaded file to your Path.
New to editing the Windows PATH? This short video shows exactly how to take a downloaded CLI
file and add it to your system PATH — the same steps work for the android CLI here and for
gh in the next section:
Once it's on your Path, close and reopen PowerShell, then:
android update
android skills add --all
Verify: android --version and android skills list.
9. GitHub CLI (gh)
gh is how the kit backs your app up to your own private GitHub repo — /kit-save-to-github
uses it to create the repo and push, with no git commands for you to learn. GitHub's recommended
install is WinGet:
winget install --id GitHub.cli
gh auth login
Prefer a download? Grab the MSI installer from GitHub's official page,
cli.github.com (the Install dropdown → Windows — Download MSI).
scoop install gh also works if you use Scoop. At the login prompts pick
GitHub.com → HTTPS → Login with a web browser. Verify: gh auth status.
WinGet and the MSI installer add
ghto your Path for you. If you grabbed a plain download instead andghisn't recognized, add its folder to your Path the same way as the android CLI — see the PATH video in step 8 above.
Prefer clicking to typing? GitHub Desktop (optional) is a friendly GUI for the same thing — see your changes and push with a button. The kit works with either;
ghis what/kit-save-to-githubautomates for you.
scrcpy (optional)
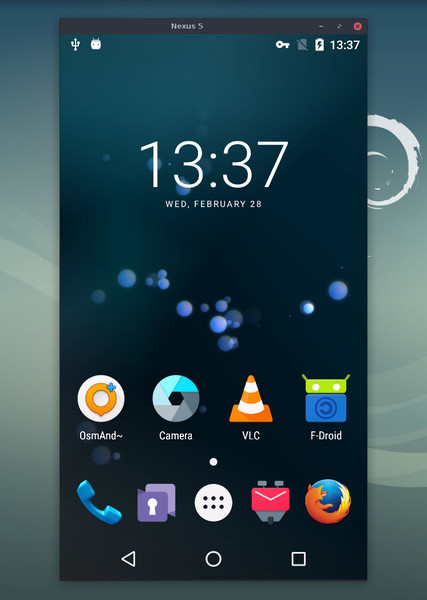
scrcpy mirrors your Android phone on your PC — you see the screen in a window and control it with your mouse and keyboard. Great for testing and recording without picking up the device.
scoop install scrcpy
Windows gotcha: in the kit's
local.properties, write the SDK path with escaped (doubled) backslashes —sdk.dir=C:\\Users\\You\\AppData\\Local\\Android\\Sdk— because a Java.propertiesfile reads a single\as an escape character./kit-start-setuphandles this for you.
Make your builds fast — Defender exclusions (strongly recommended)
This is the single biggest difference between a Windows setup that builds in minutes and one that builds in half an hour. An Android build writes tens of thousands of files, and Windows Defender's real-time protection scans every one of them as it appears. Excluding the three folders involved routinely cuts build times by more than half. It's Microsoft's own recommendation for Android development, and Android Studio's Build Analyzer suggests it too.
The trade-off, plainly: Defender stops real-time scanning inside those three folders. The rest of your machine is unaffected. It does lower your protection there, so only do it if you're comfortable with that — and only for these paths, which contain build tools and your own code.
Open PowerShell as Administrator (Start → type PowerShell → Run as administrator):
Add-MpPreference -ExclusionPath "$env:USERPROFILE\.gradle"
Add-MpPreference -ExclusionPath "$env:LOCALAPPDATA\Android\Sdk"
Add-MpPreference -ExclusionPath "C:\path\to\your\project"
Replace the last path with your actual project folder. To undo any of them later, run the same
line with Remove-MpPreference instead.
Prefer clicking? Windows Security → Virus & threat protection → Manage settings → Add or remove exclusions → Add an exclusion → Folder, then add the same three.
Using a different antivirus? Same three folders — exclude them there.
The first build takes 10–30 minutes. That's normal.
The first time you build, Gradle downloads about 1 GB: the build tools, the Android Gradle Plugin, Kotlin, Compose, and the kit's libraries. It prints very little while it does this, so it looks frozen. It isn't. Every build after the first one takes seconds.
Two things make this go wrong on Windows:
- Skipping the Defender exclusions above turns a ~6-minute first build into 20–30 minutes.
- Letting an AI agent run the build in the foreground. Most agents cut off a single command
after about 2 minutes — OpenCode's limit is a hard one you can't raise. The agent then kills
Gradle mid-download, and the retry can hang on the lock files the killed run left behind. The
/kit-*commands now start builds in the background and poll them, which sidesteps this entirely — make sure you're on the latest commands with/kit-update.
If a build really does seem stuck — no new output for several minutes — run /kit-env-check
and ask it for Step 7, or clear the stale locks yourself:
taskkill /F /IM java.exe
Remove-Item "$env:USERPROFILE\.gradle" -Include *.lock -Recurse -Force
Then start the build again. You won't lose the download — only the lock files go.
Verify everything — /kit-env-check
Once the tools are installed and you've created your project, open it in your AI agent and run:
/kit-env-checkIt checks JDK 17+, ANDROID_HOME, adb, the android CLI, the Android Skills, and the optional
tools — and prints the exact install command for anything still missing. Green across the board
means you're ready.
Troubleshooting
| Problem | Fix |
|---|---|
java -version shows the wrong version | Re-check JAVA_HOME points at JDK 17 |
adb: command not found | ANDROID_HOME / Path not set, or terminal not restarted |
android: command not found | The android CLI isn't on your Path — re-add it |
Build: SDK location not found | Wrong sdk.dir in local.properties — use escaped backslashes (C:\\Users\\...) |
| Nothing works after editing env vars | Restart the terminal (Windows especially) |
| First build is taking 20+ minutes | Normal without the Defender exclusions — add them, and let the download finish |
| Build hangs with no output at all | A previous run was killed and left lock files. taskkill /F /IM java.exe, delete *.lock under %USERPROFILE%\.gradle, re-run |
| Agent says the build "timed out" | It ran Gradle in the foreground. Run /kit-update — the current commands run builds in the background |
Still stuck? Run /kit-env-check — it diagnoses and prints the fix.
Next: Creating a New Project — clone the kit and run it for the first time.